

How to Build a Triangle Wedding Arch
Planning a wedding can be an exciting yet daunting task, especially when it comes to creating the perfect setting. One beautiful and trendy element to consider is a DIY triangle wedding arch. Ready to throw the best party ever? Let’s dive into how you can build a stunning triangle wedding arch that will make your special day unforgettable.
DIY Triangle Wedding Arch: Step-by-Step Guide
Materials Needed for a Triangle Wedding Arch

To create a gorgeous triangle wedding arch, you’ll need the following materials:
- Wooden Beams: Three pieces of 8-foot-long 2×4 wooden beams. Ensure the wood is sturdy and free from cracks or knots, as this will form the foundation of your arch.
- Wood Screws: 3-inch wood screws for securing the beams. These will provide the necessary strength to hold your arch together.
- Drill: For making holes and driving screws. A power drill will save time and effort, ensuring precise and secure assembly.
- Saw: To cut the wood to the required lengths. A handsaw or circular saw will work; just be sure to make clean, straight cuts.
- Measuring Tape: To ensure precise measurements. Accuracy is key to ensuring your arch is symmetrical and stable.
- Level: To make sure your arch is straight. A level ensures that your arch stands upright and doesn’t lean to one side.
- Sandpaper: For smoothing the wood surfaces. Smooth surfaces prevent splinters and give your arch a polished finish.
- Paint or Stain: To finish the wood according to your desired look. Choose a color or stain that complements your wedding theme.
Choosing the Perfect Design for Your Triangle Arch
Selecting the right design is crucial for the aesthetic appeal of your triangle wedding arch. Here are a few design considerations:

- Rustic Charm: Use untreated wood and minimalistic decorations for a natural, rustic look. This style works well for outdoor weddings in natural settings like gardens or barns.
- Modern Elegance: Opt for sleek, painted wood and contemporary decorations. This design is perfect for more formal settings, providing a clean and sophisticated look.
- Bohemian Vibe: Incorporate macramé or floral garlands for a boho-chic style. This design adds a touch of whimsy and can be enhanced with colorful flowers and textured fabrics.
Step-by-Step Instructions
Step 1: Measure and Cut the Wood
- Measure: Using the measuring tape, mark the lengths needed for the beams. Typically, two beams will be the sides of the triangle, and one will be the base. Standard lengths are 6 to 8 feet, depending on the desired height of your arch.
- Cut: Carefully cut the beams to your desired lengths. Use a saw to make clean, straight cuts. Double-check your measurements before cutting to avoid mistakes.
Step 2: Sand the Edges
- Sand: Use sandpaper to smooth the edges of the beams to prevent splinters and give a polished finish. Sand along the grain of the wood for best results, ensuring all surfaces are smooth to the touch.
Step 3: Assemble the Triangle
- Lay Out the Beams: Arrange the beams on the ground in a triangle shape. Make sure the angles at the joints are correct to form an equilateral triangle.
- Drill Holes: Drill pilot holes at the joints where the beams meet. This prevents the wood from splitting when you insert the screws.
- Screw Together: Use the wood screws to secure the beams together at the joints. Tighten the screws firmly, but avoid over-tightening to prevent damage to the wood.
Step 4: Stand and Secure the Arch
- Level the Arch: Use a level to ensure the arch stands straight. Adjust the position of the beams as necessary to make sure the arch is upright and stable.
- Support: If necessary, use additional supports or anchor the base for stability. You can use stakes or sandbags to secure the base, especially if the arch will be placed on uneven ground or in a windy area.
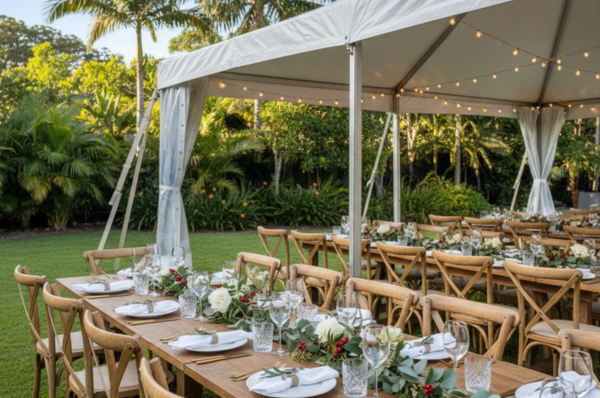
Decorating Your Triangle Wedding Arch
Decorating your triangle wedding arch can be as simple or as elaborate as you desire. Here are some popular decoration ideas:

- Floral Arrangements: Adorn the arch with fresh or silk flowers matching your wedding theme. Consider using seasonal blooms for a cohesive look and adding greenery for a lush, natural effect.
- Fabric Drapes: Use flowing fabrics like chiffon or tulle to add elegance. Drape the fabric loosely around the beams, allowing it to cascade to the ground for a romantic, ethereal look.
- String Lights: Incorporate fairy lights to create a magical, evening glow. Wrap the lights around the beams or weave them through floral arrangements for a sparkling effect.
- Greenery: Add foliage and greenery for a lush, natural look. Use ivy, ferns, or eucalyptus to create a verdant backdrop that complements any floral decorations.
Tips for Building a Sturdy Triangle Arch
- Use Quality Wood: Ensure your wooden beams are strong and free from defects. High-quality wood will provide a stable and durable structure for your arch.
- Secure Joints Firmly: Tighten all screws and joints to avoid wobbling. Check each joint for stability and reinforce as needed to ensure your arch remains secure.
- Check for Level: Continuously check that your arch is level during assembly. Use a level at each stage of construction to maintain a straight and balanced arch.
Budget-Friendly Triangle Wedding Arch Ideas
Creating a beautiful wedding arch doesn’t have to break the bank. Here are some budget-friendly tips:
- DIY Decorations: Make your own decorations using materials from craft stores. Handmade items add a personal touch and can be tailored to fit your wedding theme.
- Second-hand Materials: Use reclaimed wood or second-hand decorations. Thrift stores and online marketplaces often have unique items at a fraction of the cost.
- Minimalistic Design: Sometimes less is more; a simple, well-executed design can be very elegant. Focus on a few key elements to create a stunning visual impact without overspending.
Conclusion
Building a DIY triangle wedding arch is a rewarding project that adds a personal touch to your wedding day. By following these steps and tips, you can create a stunning focal point that will impress your guests and provide the perfect backdrop for your ceremony. Make your event unforgettable with us! For all your party equipment needs, visit Brisbane Party Hire to ensure a stress-free and memorable celebration.
Have you tried building your own wedding arch? Share your experiences and tips in the comments below, and don’t forget to subscribe to our newsletter for more DIY event planning ideas!
